In the world of data management, the ability to seamlessly transfer data between different platforms is a crucial skill. One such important data operation is the import of data from an Oracle Database to Microsoft Excel. This process involves the use of an Open Database Connectivity (ODBC) driver, a universal data access interface that connects with a database to facilitate data exchanges. In this guide, we will specifically focus on using the Devart ODBC driver to perform this operation.
The process of importing data from Oracle Database to Excel using the Devart ODBC driver is not only straightforward but also offers numerous benefits. For one, it allows users to leverage Excel’s data analysis and visualization tools on data stored in Oracle Database, thereby providing valuable insights that can drive decision-making. Additionally, this process enables data backup in a format that is widely accessible and easy to understand.
Whether you’re a database administrator seeking to provide your team with easier access to Oracle data, or a data analyst looking to perform advanced analysis in Excel, understanding this process can significantly enhance your data management capabilities. Join us as we delve into this comprehensive guide on how to import data from Oracle Database to Excel using the Devart ODBC driver.
Understanding the Basics
Before we delve into the process of importing data from Oracle Database to Excel using the Devart ODBC driver, it’s essential to understand the fundamental components involved in this operation.
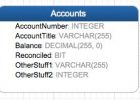
Oracle Database is a robust relational database management system (RDBMS) developed by Oracle Corporation. It is widely used by large enterprises for its ability to handle and manage vast amounts of data efficiently. Oracle Database provides a flexible and cost-effective way to manage information and applications. It supports a wide range of transaction processing, business intelligence, and content management applications, making it a versatile choice for many organizations.
Microsoft Excel, on the other hand, is a spreadsheet program included in the Microsoft Office suite. It’s primarily used for data organization, analysis, and visualization. Excel’s powerful computational and graphical capabilities make it an excellent tool for performing detailed data analysis and generating insightful reports. It’s also widely used due to its user-friendly interface and compatibility with other Microsoft Office applications.
ODBC, or Open Database Connectivity, is a standard application programming interface (API) for accessing database management systems (DBMS). The role of ODBC in data import is pivotal. It acts as a middleman between applications and DBMS, allowing them to interact and exchange data. In our case, the Devart ODBC driver will facilitate the connection between Oracle Database and Excel, enabling data import.
Understanding these three components is crucial as they form the foundation of the data import process. Oracle Database is the source of our data, Excel is the destination, and the Devart ODBC driver is the conduit that makes the data transfer possible. With this knowledge, we’re now ready to delve into the specifics of setting up the environment for data import.
Connecting Excel to Oracle Database using ODBC
Leveraging the Devart ODBC driver to establish a connection between Oracle Database and Excel is a widely adopted approach due to its efficiency and ease of use. Here’s a detailed, step-by-step guide on how to accomplish this:
Step 1: Installation of the ODBC Driver Begin by installing the Devart ODBC driver on your computer. This driver acts as the intermediary that facilitates the communication between Oracle Database and Excel.
Step 2: Accessing Excel’s Data Tab Once the driver is installed, launch Excel and navigate to the ‘Data’ tab located in the ribbon at the top of the application.
Step 3: Selecting Data Source In the ‘Data’ tab, locate and click on the ‘From Other Sources’ button. A dropdown menu will appear. From this menu, select the ‘From Data Connection Wizard’ option.
Step 4: Choosing ODBC DSN in the Data Connection Wizard The Data Connection Wizard will open. In this wizard, choose the ‘ODBC DSN’ option. This selection informs Excel that you intend to use an ODBC driver for the data connection.
Step 5: Selecting the ODBC Driver A list of available ODBC drivers will be displayed. From this list, select the Devart ODBC driver that you installed in Step 1.
Step 6: Inputting Connection Details You will be prompted to enter the connection details for your Oracle Database. These details include the hostname, port, username, and password. Ensure that these details are entered correctly to establish a successful connection.
Step 7: Testing the Connection After entering the connection details, test the connection to ensure that Excel can communicate with your Oracle Database. If the test is successful, click ‘Finish’ to complete the connection setup.
Method to Load Oracle Data into Excel
Once the connection between Oracle Database and Excel is established, the process of importing data becomes quite simple. Here’s an enhanced, step-by-step guide to importing data from Oracle Database to Excel using the Devart Oracle ODBC driver:
Step 1: Navigate to Excel’s Data Tab Open Microsoft Excel and proceed to the ‘Data’ tab located in the ribbon at the top of the application.
Step 2: Initiate the Data Connection Wizard Within the ‘Data’ tab, locate and click on the ‘From Other Sources’ button. From the dropdown menu that appears, select ‘From Data Connection Wizard’.
Step 3: Choose the ODBC DSN Option In the Data Connection Wizard, select the ‘ODBC DSN’ option and click ‘Next’.
Step 4: Select the Devart Oracle ODBC Driver The wizard will then display a list of available ODBC drivers. From this list, select the Devart Oracle ODBC driver and click ‘Next’.
Step 5: Input Oracle Database Connection Details You will now be prompted to enter the connection details for your Oracle Database. This includes the hostname, port, and your Oracle Database username and password.
Step 6: Test and Finalize the Connection Test the connection to ensure that Excel can communicate with your Oracle Database via the Devart ODBC driver. If the test is successful, click ‘Finish’ to complete the setup.
Step 7: Select Data for Import In the ‘Import Data’ dialog box that appears, select the table or view you wish to import and click ‘OK’.
Step 8: Choose Data Import Location Finally, choose the location in your Excel spreadsheet where you want to import the data, and click ‘OK’.
The Devart Oracle ODBC driver is a robust software driver that enables applications to connect to Oracle databases via the Open Database Connectivity (ODBC) interface. It supports all major Oracle versions, including Oracle 12c, and offers a range of features for working with Oracle data. These include support for Unicode data, stored procedures, large objects (LOBs), Oracle-specific data types, Oracle Advanced Security features, and Oracle RAC (Real Application Clusters).
The driver also provides a variety of configuration options, allowing users to adjust the connection settings to optimize performance and security. It supports connection pooling, which allows multiple applications to share a single connection to the database, thereby improving performance and scalability.
Known for its ease of use and reliability, the Devart Oracle ODBC driver provides a user-friendly interface for configuring connections and accessing Oracle data. It is backed by a team of experienced developers and support staff who provide ongoing updates and assistance to users. To experience its capabilities, you can download the ODBC for Oracle.
Optimizing the Data Import Process
Efficient data import is crucial for maintaining data integrity and ensuring smooth operations. Here are some tips and best practices to optimize the data import process from Oracle Database to Excel using the Devart ODBC driver:
1. Plan Your Import: Before initiating the import process, understand the structure of your Oracle Database and the data you need in Excel. This understanding will help you select the right tables and views during the import process, saving time and resources.
2. Use Efficient SQL Queries: When importing data, efficient SQL queries can significantly speed up the process. Try to avoid complex queries and use WHERE clauses to limit the data you’re importing, especially when dealing with large datasets.
3. Leverage Excel’s Data Tools: Excel has a range of data tools that can help optimize the import process. For instance, the ‘Remove Duplicates’ feature can help clean your data, and the ‘Sort & Filter’ tools can help organize your data after import.
Handling Large Datasets: When dealing with large datasets, consider importing the data in chunks to prevent Excel from becoming overwhelmed. Also, remember that Excel has a row limit (1,048,576 rows), so ensure your data fits within this limit. If your data exceeds this limit, you may need to split it across multiple Excel sheets or use a database management tool better suited for handling large datasets.
Conclusion
In this guide, we’ve walked through the comprehensive process of importing data from Oracle Database to Excel using the Devart ODBC driver. This process not only simplifies data management but also opens up new possibilities for data analysis and visualization in Excel. With the understanding of Oracle Database, Excel, and the role of ODBC in data import, you’re now equipped with the knowledge to streamline your data operations. We encourage you to take the first step and start your data import process. Remember, efficient data management is a journey, and every step you take brings you closer to your goal. Happy data importing!

